openelab.de
 openelab.com


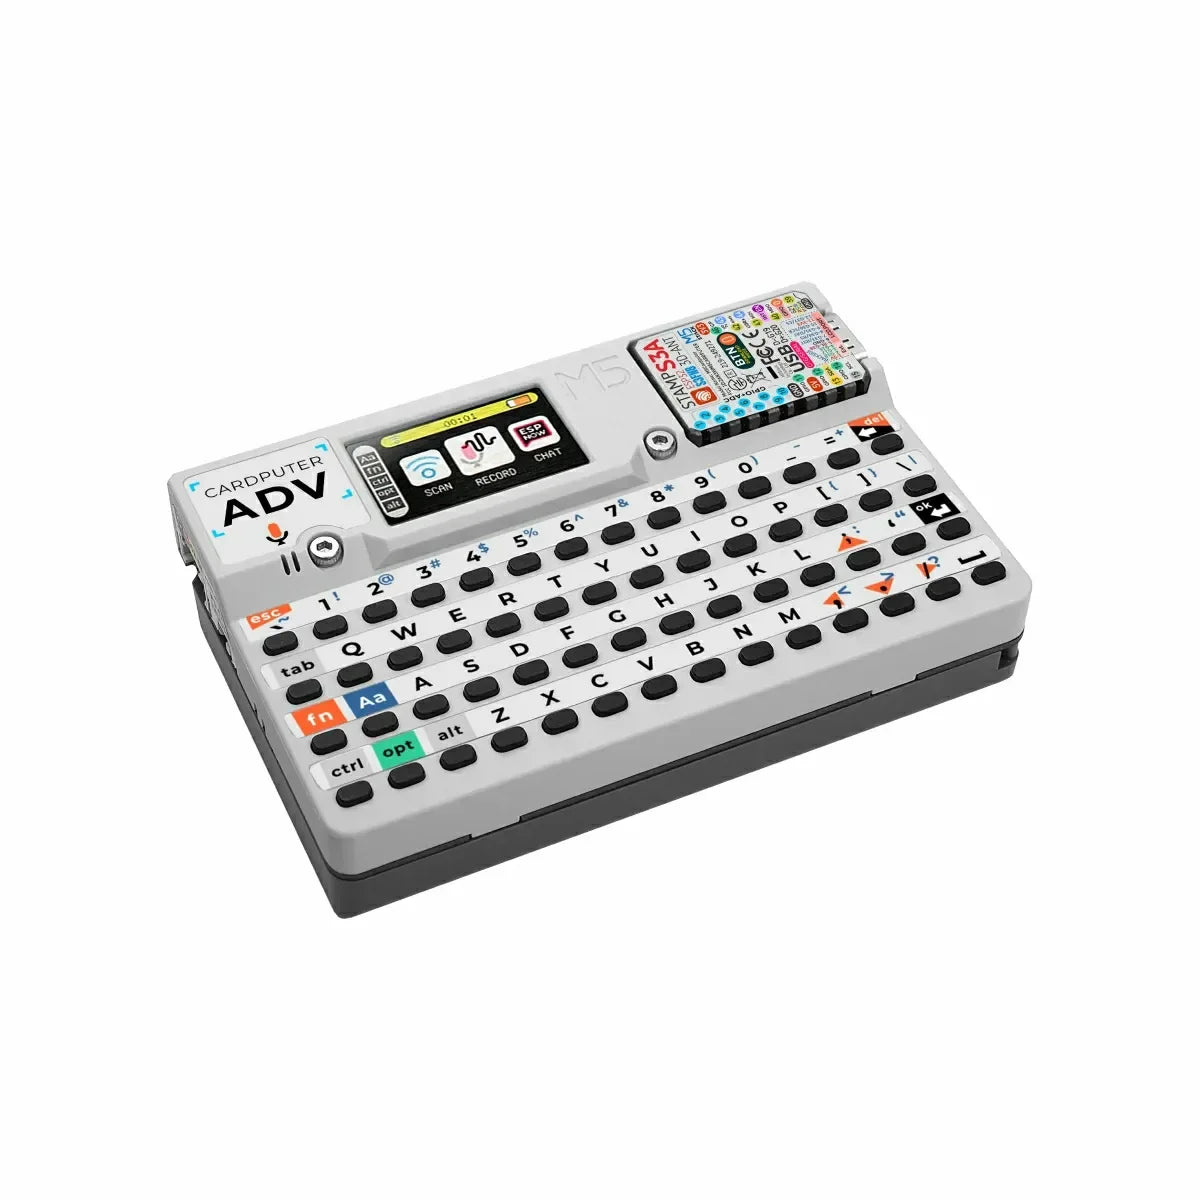
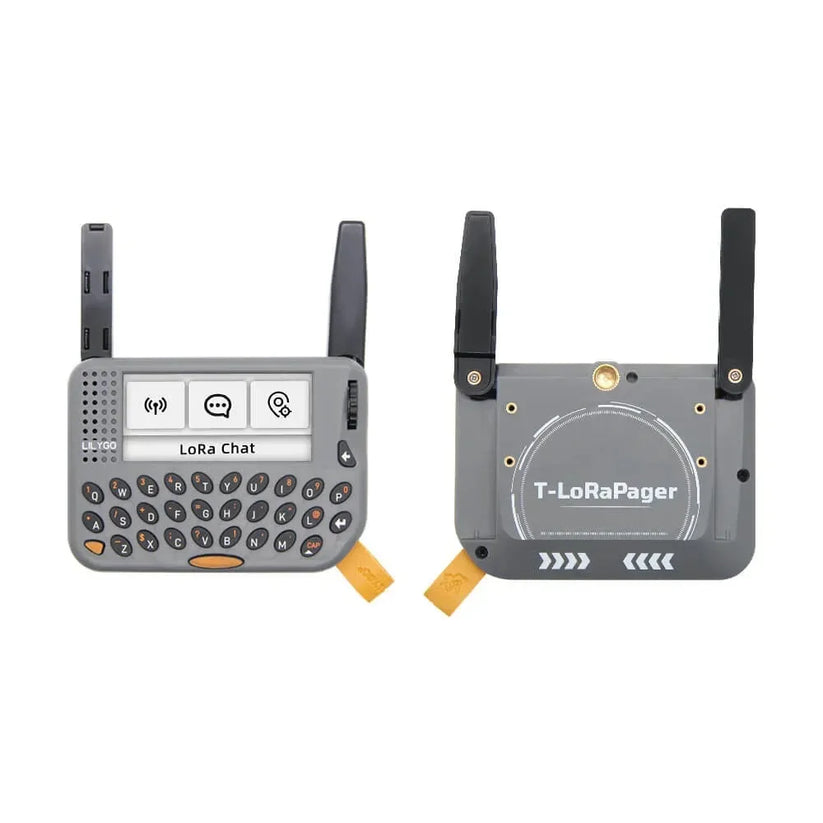
What is LILYGO T-Lora Pager? 📡
LILYGO T-Lora Pager is a compact, handheld AIOT development device 🤖 designed by LILYGO for advanced LoRa wireless communication 📶 projects. Built around the powerful ESP32-S3 microcontroller ⚡, the LILYGO T-Lora Pager offers seamless integration of Wi-Fi 🌐, Bluetooth 🔗, and Sub-GHz LoRa 📡 capabilities, making it ideal for low-power 🔋, long-range IoT applications 🌍.
This versatile LILYGO T-Lora Pager features a full QWERTY keyboard ⌨️, a vibrant 2.33-inch color display 🖥️, and built-in GPS 📍, NFC 🔖, audio support 🔊, and multiple IoT sensors 📡, enabling developers to build interactive, location-aware, and connected systems. Its ergonomic design and portable form factor make it perfect for field deployment 🚀, prototyping 🧩, and mobile control interfaces 🎛️.
Fully compatible with the Arduino IDE 💻, PlatformIO ⚙️, and other mainstream IoT development platforms, the LILYGO T-Lora Pager provides a flexible and programmable environment for creating innovative wireless communication solutions 📡 within the LILYGO ecosystem 🌱.
Arduino IDE Quick Start Guide ⚙️💻
- 📥 Install the Arduino IDE.
- 🔗 Install the Arduino ESP32 board package version 3.3.0-alpha1 or later (preferably the latest version).
Use the Arduino Board Manager URL: https://espressif.github.io/arduino-esp32/package_esp32_dev_index.json - 📦 Download the LilyGoLib library.
- 📂 In the Arduino IDE, go to Sketch → Include Library → Add .ZIP Library, and select the LilyGoLib ZIP file you downloaded.
- 📦 Install the LilyGoLib-ThirdParty package.
- 📂 Copy all the folders inside the LilyGoLib-ThirdParty directory into your Arduino IDE’s libraries folder.
If the libraries folder does not exist, please create it.
Note ⚠️: Do not copy the entire LilyGoLib-ThirdParty directory itself, only the folders contained within it. - 💻 Locate your Arduino libraries folder on your computer:
🪟 Windows: C:\Users\{username}\Documents\Arduino
🍎 macOS: /Users/{username}/Documents/Arduino
🐧 Linux: /home/{username}/Arduino
| Arduino IDE Setting ⚙️ | Value 📊 |
| Board 🖥️ | LilyGo-T-LoRa-Pager |
| Port 🔌 | Your port |
| USB CDC On Boot 🔗 | Enabled ✅ |
| CPU Frequency ⚡ | 240MHZ(WiFi) |
| Core Debug Level 🐞 | None |
| USB DFU On Boot 🔄 | Disable ❌ |
| Erase All Flash Before Sketch Upload 🧹 | Disable ❌ |
| Events Run On 🧩 | Core 1 |
| JTAG Adapter 🔧 | Disable ❌ |
| Arduino Runs On 💻 | Core 1 |
| USB Firmware MSC On Boot 💾 | Disable ❌ |
| Partition Scheme 📂 | 16M Flash(3M APP/9.9MB FATFS) |
| Board Revision 📡 | Radio-SX1262 |
| Upload Mode 📤 | UART0/Hardware CDC |
| Upload Speed 🚀 | 921600 |
| USB Mode 🔗 | CDC and JTAG |
LILYGO T-LoRa-Pager Download Mode Instructions 📥
- 🔗 Connect your board via a USB-C cable.
- 👆 Press and hold the BOOT button.
- ➡️ While holding BOOT, release the RST button.
- 👌 Then release the BOOT button.
- ✅ The USB port should now remain stable without flashing. You can proceed by clicking Upload.
- 🔄 Press the RST button to exit download mode.
Final Thoughts on LILYGO T-Lora Pager 💭📡
The LILYGO T-Lora Pager is more than just a compact LoRa development board—it’s a fully integrated AIOT handheld device 🤖. With its combination of ESP32-S3 processing power ⚡, Sub-GHz LoRa 📡, Wi-Fi 🌐, Bluetooth 🔗, and rich peripherals like GPS 📍, NFC 🔖, audio 🔊, and QWERTY keyboard ⌨️, it stands out as a flexible and portable solution for IoT prototyping 🧩, field deployment 🚀, and interactive control interfaces 🎛️.
Its compatibility with Arduino IDE 💻, PlatformIO ⚙️, and the LILYGO ecosystem 🌱 ensures smooth development. Modular RF options (SX1262, SX1280, CC1101, LR1121, SI4432) 📡 allow tailoring to specific wireless protocols. Whether building a mesh network 🌐, a remote telemetry node 📊, or a location-aware IoT controller 📍, the LILYGO T-Lora Pager delivers performance, flexibility, and developer support to bring ideas to life 🎯.