openelab.de
 openelab.com


Home Assistant Green is the easiest plug-and-play way to start with Home Assistant: connect Ethernet and power, then complete onboarding in your browser or the mobile app. It comes with Home Assistant preinstalled, so you can be up and running in minutes.
Get your Home Assistant Green
Getting started
Getting started with Home Assistant Green
Before you begin
-
Network: Ethernet connection to your router or switch (recommended for reliability). Avoid Wi‑Fi dongles for the controller itself.
-
Power supply: 12 V DC, 1 A, center‑positive adapter (original or equivalent).
-
Access device: A desktop browser or the Home Assistant mobile app for onboarding.
-
What to expect: Initial setup downloads components and may take a while depending on connection speed; this is normal.
Quick setup
-
Connect Ethernet: Plug one end into Green and the other into your router/switch. Ensure the connector locks into place.
- Power up: Connect power to the outlet, then to Green. Wait a few minutes for the system to boot.
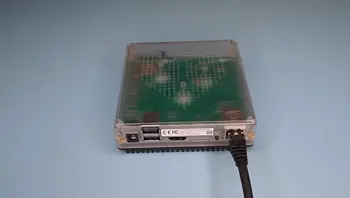
- Checking the status light: Wait for a few minutes until the yellow light starts blinking in a heartbeat pattern.

Access the UI:
Desktop: visit http://homeassistant.local:8123
Mobile: install the app via QR code, then confirm the detected server IP (for example, http://192.168.1.196:8123) Follow the onboarding to set up your account, location, and language.
Starting up
There are two ways to start your Home Assistant Green, depending on whether it is still connected to power and Ethernet, or has been fully disconnected.
If the device is still connected to Ethernet and power
- Press the power button Briefly press the button once. Wait until the yellow LED starts flashing in a heartbeat pattern (steady, rhythmic blink) — this means the system is ready.
-
Connect to Home Assistant
-
Mobile: Open the Home Assistant app, confirm the detected server IP (e.g.,
http://192.168.1.196:8123). -
Desktop: In your browser, visit
http://homeassistant.local:8123to open the Home Assistant interface.
-
If the device has been fully disconnected from power
- Connect to the network Plug the Ethernet cable into your Home Assistant Green until it clicks into place, then connect the other end to your router or switch.
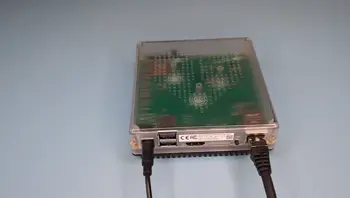
- Restore power Plug the power adapter into a wall outlet, then into the device’s power port.
- Wait for the system to boot When the yellow LED begins the heartbeat pattern, the system has started successfully.
- Access the user interface Use the same connection steps as above (mobile or desktop).
Tips for a smooth start‑up
-
If this is your first time setting up Home Assistant Green, follow the full onboarding steps instead of this quick start.
-
If you cannot access
http://homeassistant.local:8123, tryhttp://homeassistant:8123or locate the device’s IP address in your router settings, then enter it in your browser. -
Wired Ethernet is recommended for stability and lower latency, especially when running add‑ons or complex automations.
Shutting down the device
There are two safe ways to shut down your Home Assistant Green. Always follow these steps to avoid data loss or file system corruption.
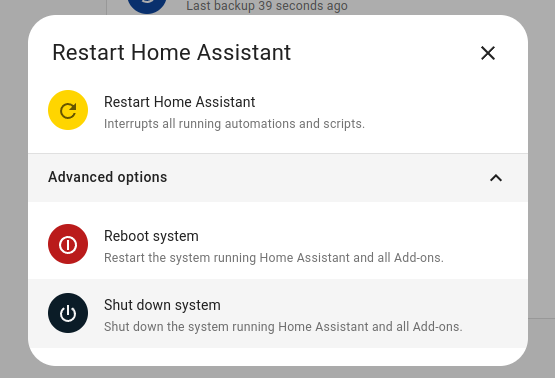
Option 1 — Shut down from the Home Assistant UI (recommended)
-
In the UI, go to Settings → System.
-
In the top‑right corner, select the three‑dots menu.
-
Choose Restart Home Assistant, then Shut down system.
-
Wait until all LEDs are off before disconnecting power.
Option 2 — Shut down using the hardware power button
Use this method if you cannot access the UI.
-
Graceful shutdown: Press and hold the power button for 6 seconds, then release. This allows the system to close processes safely.
-
Hard shutdown (last resort): Press and hold the power button for 12 seconds. Only use this if all other methods fail, as it may cause data loss.
-
After either shutdown, wait until all LEDs are off before unplugging power.
Best practice tips
-
A graceful UI shutdown is always preferred for system stability.
-
Avoid frequent hard shutdowns to maintain SD card or eMMC health.
-
If troubleshooting, perform a restart before a complete shutdown to preserve logs.
About the Home Assistant Green
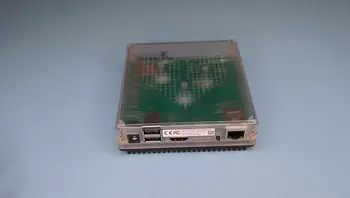
About Home Assistant Green
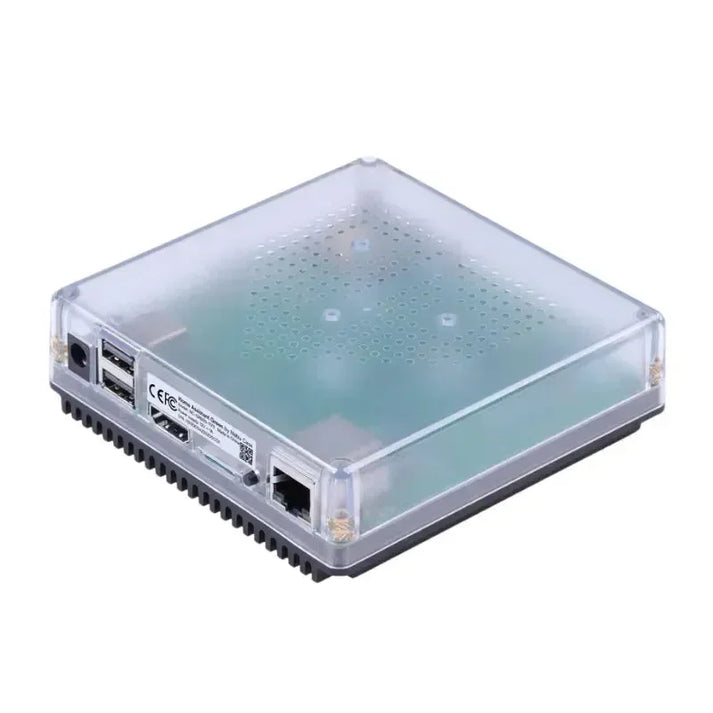
Home Assistant Green is an official smart home hub designed specifically to run the full Home Assistant Operating System. It arrives pre‑installed and ready to go — simply connect power and Ethernet, and you can start automating your home within minutes.
Built for 24/7 operation, it delivers outstanding energy efficiency, consuming only around 3 W under heavy load and ~1.7 W when idle. This makes it perfect for continuous use without driving up your electricity bill.
Unlike DIY builds, no custom hardware assembly or tinkering is required — Green is a plug‑and‑play solution that combines reliability, low power consumption, and the flexibility to integrate with thousands of smart home devices via Home Assistant’s ecosystem.
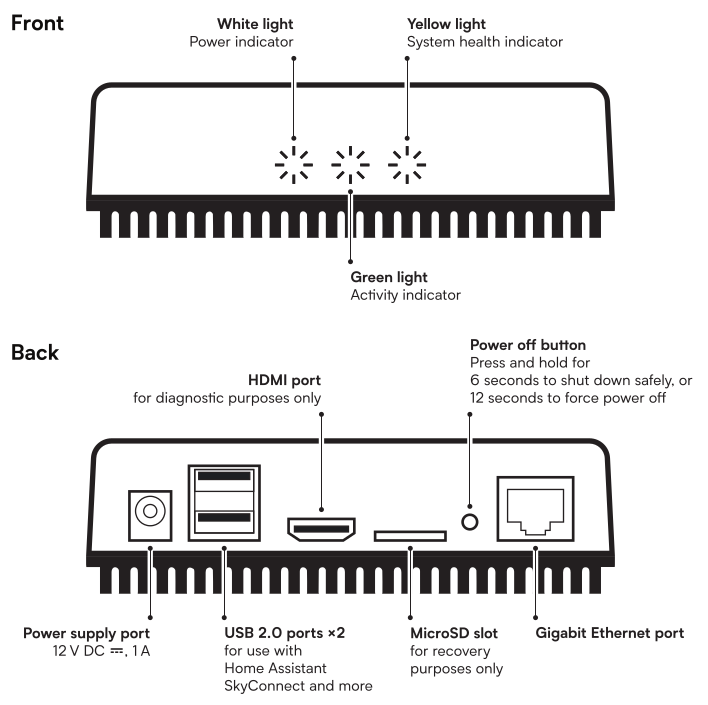
About the status lights (LEDs) on Home Assistant Green
Your Home Assistant Green has three front‑panel LEDs, each telling you something about the device’s state:
| LED Color | Name | What it Means | Quick Tip |
|---|---|---|---|
| ⚪ White | Power LED | Shows if the hub is receiving power. Off means no power — check the adapter and cable. | Always confirm this is lit after plugging in. |
| 🟢 Green | Activity LED | Blinks or stays lit when there’s system activity — like eMMC storage access or CPU load. | Flickering during startup is normal. |
| 🟡 Yellow | System Health LED | Pulses in a slow “heartbeat” pattern when the Home Assistant OS is running normally. | If it’s not pulsing, the OS may not have fully loaded. |
Why These Matter
-
Fast troubleshooting — a glance at the LEDs can tell you if the issue is power, boot, or OS‑related.
-
Non‑intrusive monitoring — see system health without logging in.
-
Always‑on feedback — handy during installation or after changes.
Interfaces
The Home Assistant Green includes several built‑in ports and slots so you can expand its capabilities or perform maintenance when needed.
| Interface | Purpose | Example Uses |
|---|---|---|
| 💡 3 Status LEDs | Show power, activity, and system health at a glance. | Quick troubleshooting without opening the case. |
| 📀 MicroSD Slot | Recovery and diagnostics. | Reload the OS if needed using a prepared recovery card. |
| 📺 HDMI Port | Visual output for recovery/diagnostics. | Connect to a monitor to view boot messages or troubleshoot. |
| 🔌 2× USB‑A Ports | Add new connectivity options. | • Plug in a Home Assistant Connect ZBT‑1 for Zigbee now, and Thread in the future.<br>• Add a Z‑Wave USB stick for Z‑Wave devices.<br>• Connect other compatible accessories. |
| ⚡ Power Port (12 V DC, 1 A, center‑positive) | Main power input. | Use the included adapter for reliable operation. |
Tip for New Users
Even if you’re starting with only Ethernet‑connected devices, these ports mean you can grow your smart home over time — adding Zigbee, Thread, Z‑Wave, or other integrations as your setup evolves.
Disabling the status lights (LEDs) of Home Assistant Green
If the status LEDs feel too bright in your space — for example, in a bedroom, media room, or low‑light setup — you can easily turn them off through Home Assistant’s settings.
Note: This only disables the device’s front‑panel status lights. The Ethernet port’s built‑in light cannot be switched off.
What You’ll Need
-
Administrator access to your Home Assistant instance.
How to Disable the LEDs
-
Open Settings in the Home Assistant interface.
-
Go to System → Hardware.
-
Select Configure → Configure hardware settings.
-
Toggle off the LEDs you want to disable.
-
Click Submit to save changes.
Result
The selected status lights are now disabled — giving you a darker, distraction‑free environment without affecting the system’s operation.
Enabling the status lights (LEDs) of Home Assistant Green
If you’ve previously turned off the status LEDs and want visual feedback again — for example, during troubleshooting or device monitoring — you can easily switch them back on in Home Assistant.
Note: This controls only the front‑panel status lights. The Ethernet port’s built‑in link light cannot be toggled.
What You’ll Need
-
Administrator access to your Home Assistant instance.
How to Enable the LEDs
-
Open Settings in the Home Assistant interface.
-
Go to System → Hardware.
-
Select Configure → Configure hardware settings.
-
Turn on the toggle(s) for the LEDs you want active.
-
Click Submit to apply the change.
Result
Your chosen status lights are now illuminated again — giving you at‑a‑glance confirmation of power, activity, and system health.
Data handling
Creating a backup
Creating a Backup in Home Assistant
Your Home Assistant setup is the heart of your smart home — holding hours (or even years) of configuration, automations, and personal tweaks. Regular backups ensure you can recover quickly if something goes wrong, without rebuilding from scratch.
What’s Included in a Backup
-
All system configuration files
-
Add‑on data and settings
-
Automations and scripts you’ve created
-
Media stored within Home Assistant
Recommended Practice
Always keep at least one backup stored outside your Home Assistant device — for example:
-
A network drive or NAS
-
Home Assistant Cloud
-
External storage (e.g., USB drive)
This way, your smart home is protected even if the local device fails.
How to Create a Backup
-
Open Settings in Home Assistant.
-
Go to System → Backups.
-
Click Create backup.
-
Name your backup (optional, but helps with organizing).
-
Select your storage location(s) — include at least one off‑device option.
-
Confirm to start the backup process.
Result
Home Assistant will save your current setup. You can now restore from this backup at any time — whether you’re migrating to new hardware, recovering from a failure, or undoing an accidental change.
Restoring or migrating from a backup
You can use a backup in two main ways:
-
Restore your existing configuration on the same device — roll back Home Assistant to a previous state.
-
Migrate to a new device — for example, importing your setup from a Raspberry Pi or other hardware into a Home Assistant Green during its first‑time setup.
What’s Included in a Full Backup
A full backup contains:
-
System configuration files
-
Add‑on data and settings
-
Automations and scripts
-
Media stored in Home Assistant
Before creating a backup, you can choose which elements to include or exclude.
Estimated Time to Restore
Restoring a backup reinstalls Home Assistant Core and all add‑ons.
-
Small installations — usually quick
-
Large installations — can take 45 minutes to 1 hour
Restoring During Onboarding (Migration)
If you’re moving from another device:
-
Ensure your current installation size is smaller than the 32 GB storage on Home Assistant Green.
-
Power on Home Assistant Green following the Getting Started steps.
-
Follow the “Restoring a backup during onboarding” process to import your configuration.
Restoring on Your Current Installation
If you’re restoring on the same device:
-
Follow the “Restoring a backup on your current system” steps to recover your full setup or selected parts.
Troubleshooting
I can’t access the system via http://homeassistant.local:8123
If entering http://homeassistant.local:8123 in your browser does not open Home Assistant, try the following steps in order.
1. Try an alternative local URL
-
Use
http://homeassistant:8123instead ofhttp://homeassistant.local:8123.
2. Access via IP address
-
Log into your router’s admin interface.
-
Find the IP address assigned to your Home Assistant Green.
-
In your browser, enter:
http://<IP_ADDRESS>:8123(Replace<IP_ADDRESS>with the actual number you see in your router.)

3. Check device power and LED status
-
Ensure the device is plugged in and powered.
-
The yellow System Health LED should blink in a slow “heartbeat” pattern when Home Assistant OS is running normally.
-
See the Status LEDs section for more details.
4. Check Ethernet connection
-
Look at the LED indicator on the Ethernet port — it should be lit or blinking.
-
If not:
-
Try a different port on your router.
-
Try a different Ethernet cable.
-
Resetting the device
You can perform a factory reset on Home Assistant Green if you’re running Home Assistant Operating System 13.1 or later. This process wipes all user data, installed add‑ons, and configuration — restoring the system to a clean state while keeping the operating system installed.
Important: A reset will erase all data on the device. To avoid losing your setup, and store it on another system before proceeding.
Prerequisites
-
Home Assistant Green
-
Home Assistant OS 13.1 or later (check under Settings → About)
-
A computer with internet access
-
A backup stored externally
Step 1 – Shut Down the System
-
In Home Assistant, go to Settings → System.
-
Open the three‑dots menu in the top right and select Restart Home Assistant, then Shut down system.
-
Wait until all LEDs turn off — this is critical for the reset to succeed.
If the UI method doesn’t work:
-
Press the power button for 6 seconds for a graceful shutdown.
-
As a last resort, press for 12 seconds for a hard shutdown.
-
In all cases, wait until all LEDs are off, then unplug the power cable.
Step 2 – Start the Reset
-
Press and hold the power button.
-
Reconnect the power while ensuring the device has an internet connection.
-
Keep holding the button until the yellow System Health LED turns solid.
-
Release the button. The LEDs will begin blinking as the system downloads and reinstalls the latest Home Assistant Core and Supervisor.
Troubleshooting: If the yellow LED blinks instead of staying solid, your OS version is too old for this method. Use the SD‑card reset procedure instead.
Step 3 – Complete Onboarding
-
The initial startup may take some time, depending on internet speed.
-
Access the UI via
http://homeassistant.local:8123(desktop) or the mobile app. -
Follow the onboarding process to set up the system again.
If you see the normal UI instead of onboarding after reset, it likely failed because the shutdown wasn’t completed — repeat the procedure.
I forgot the owner password for the Home Assistant Green. How can I reset it?
If you’ve lost or forgotten the owner account password for your Home Assistant Green, you can reset it directly through the system console. This requires a keyboard, monitor, and physical access to the device.
What You’ll Need
-
Home Assistant Green
-
External monitor (connected via HDMI)
-
USB keyboard
-
The username of the existing owner account
-
A short, simple temporary password (no special characters)
Steps to Reset the Password
-
Connect the HDMI monitor and USB keyboard to the Home Assistant Green.
-
Access the system console by following the process in .
-
In the terminal, enter the command:
auth reset --username 'existing_user' --password 'new_password'
✔ Copied!-
Replace
existing_userwith the actual account username. -
Replace
new_passwordwith a temporary, simple password (letters/numbers only). -
Example:
auth reset --username 'yelena' --password '12345'
✔ Copied!
-
-
Log in to Home Assistant using the temporary password.
-
Immediately change it to a strong, complex password from within the Home Assistant User Profile → Security settings.
Important Notes
-
The command‑line reset process does not support all special characters in passwords. Always switch to a stronger password in the UI afterward.
-
Without the account username, you cannot reset the password via this method.
-
This procedure works only when you have physical access to the device.
Resetting the device using an SD card
Use this method to perform a factory reset on your Home Assistant Green when you cannot reset it through the standard menu (for example, if the OS version is older than 13.1) or when you need to fully reinstall the operating system.
Warning: This process erases all data and configuration. To prevent data loss, and store it on another system before starting.
Prerequisites
-
Home Assistant Green device
-
microSD card
-
MicroSD card reader (built‑in or external)
-
Computer with internet access
-
Backup stored externally
Step 1 – Prepare the Installer on an SD Card
-
Download the latest Home Assistant Green OS installer from (
green-installer-20240410.img.xz). -
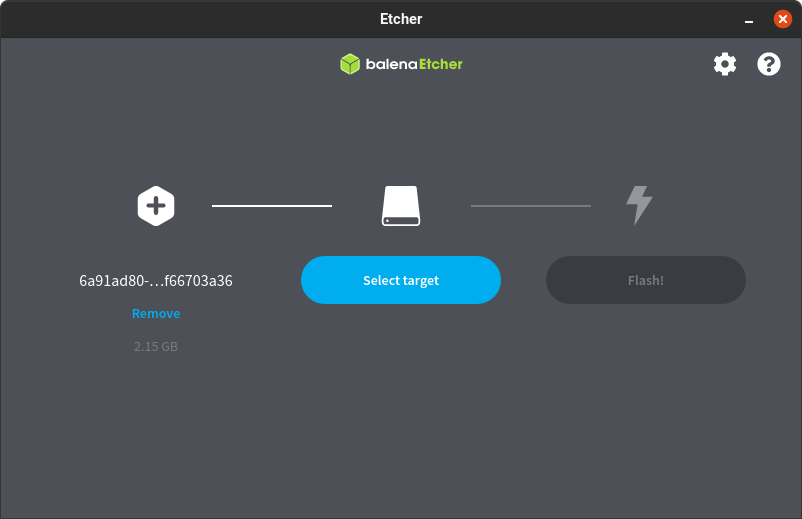
Install and open Balena Etcher (run as administrator if using Windows).
-
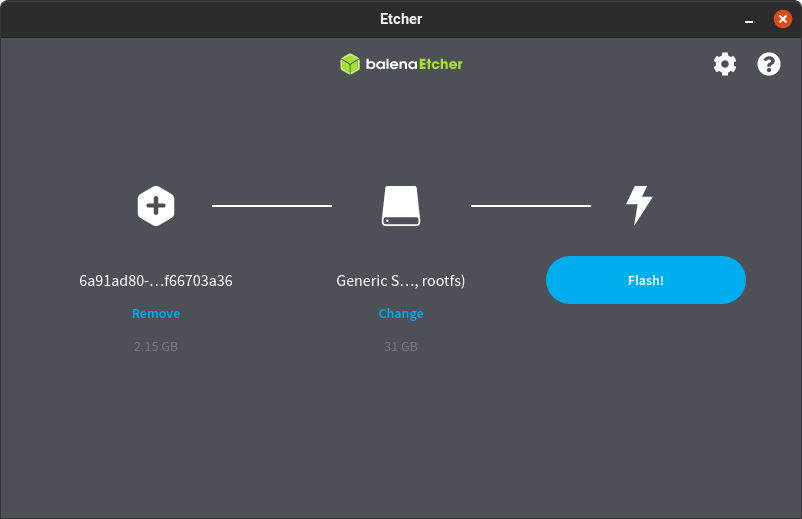
In Etcher, select Flash from file and choose the downloaded image.
-
Insert the microSD card into your computer and select it as the target.
-
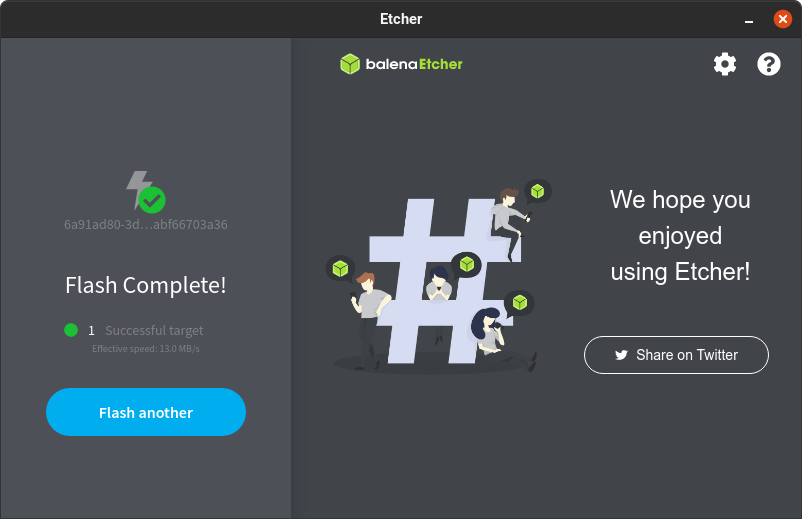
Click Flash! to write the image to the card.
-
Once complete, safely remove the SD card.
Step 2 – Shut Down the Device
-
In the Home Assistant UI, go to Settings → System, open the three‑dots menu, select Restart Home Assistant, then Shut down system.
-
Wait until all LEDs turn off before proceeding.
-
If the UI method fails:
-
Press and hold the power button for 6 seconds for a graceful shutdown.
-
As a last resort, press and hold for 12 seconds for a hard shutdown.
-
-
Disconnect the power cable.

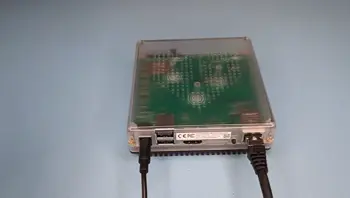
Step 3 – Insert the SD Card
-
Insert the prepared microSD card into the Home Assistant Green.
-
Ensure the device has an active internet connection.
Step 4 – Reinstall the OS
-
Press the power button to start the reset process.
-
The yellow System Health LED will blink rapidly while the OS is being written to the internal eMMC.
-
Wait until all LEDs turn off — this means the process is complete.
Step 5 – Remove the SD Card
-
Once the LEDs are off, remove the microSD card.
Step 6 – Power On and Complete Setup
-
Press the power button to start the device.
-
Wait for the yellow LED to display the heartbeat pattern, indicating the OS is running.
-
Access the UI via:
-
Desktop:
http://homeassistant.local:8123 -
Mobile app: Scan the QR code to install the app, then confirm the detected IP address.
-
-
Follow the onboarding process to set up your system.
This method reinstalls the latest Home Assistant Core, Supervisor, and required components while keeping the OS version up to date.
To Reset the Device Using an SD Card
This method will factory reset your Home Assistant Green and reinstall the latest Home Assistant components using an SD card.
Warning: This process erases all data, add‑ons, and configuration. The OS remains installed but is refreshed. To avoid losing your setup, create and store a backup outside the device before proceeding.
Step 1 — Shut Down the System
-
In the Home Assistant UI: go to Settings → System, open the three‑dots menu, select Restart Home Assistant, then Shut down system.
-
Wait until all LEDs turn off.
-
If UI shutdown fails:
-
Graceful shutdown: Hold the power button for 6 seconds.
-
Hard shutdown (only if necessary): Hold the power button for 12 seconds.
-
-
Remove the power cable.
Step 2 — Insert the SD Card
-
Insert the prepared microSD card containing the Home Assistant Green OS installer into the device.
-
Ensure the device is connected to the internet.
Step 3 — Power Up for Reinstallation
-
Press the power button.
-
The yellow LED will blink rapidly while the OS is being written to the internal storage (eMMC).
-
Wait for all LEDs to turn off — this signals that the process is complete.
Step 4 — Remove the SD Card
-
Once the LEDs are off, eject the microSD card from the device.
Step 5 — Restart the Device
-
Press the power button again.
-
When the yellow LED blinks in a heartbeat pattern, the system is running normally.
Step 6 — Complete Onboarding
-
Mobile: Install the Home Assistant app via QR code, confirm the detected IP address (e.g.,
http://192.168.x.x:8123). -
Desktop: Visit
http://homeassistant.local:8123to access the UI. -
Follow the onboarding steps to set up your system.
-
Initial startup may take a few minutes depending on internet speed.
Resetting Home Assistant Green failed
If the reset process didn’t work, the cause and fix depend on the Home Assistant OS version installed on your device.
Step 1 — Check Your OS Version
-
In the Home Assistant UI, go to Settings → About.
-
Find your Home Assistant Operating System version number.
Step 2 — If You’re on Version 13.1 or Later
-
The most common cause is not waiting long enough after shutdown.
-
Try again, following the reset without SD card steps:
-
Shut down via UI or power button.
-
Wait until all LEDs turn completely off before continuing.
-
-
Then repeat the reset steps from the beginning.
Step 3 — If You’re on a Version Older Than 13.1
-
Use the reset with SD card method instead.
-
Follow the preparation and installation steps outlined in the Resetting the device using an SD card section.
I lost the original power supply. What type do I need to get?
Replacement spec: 12 V DC, 1 A, center‑positive power supply.
FAQ - Connectivity
Does Home Assistant Green have Zigbee, Thread, Wi‑Fi, or Bluetooth?
According to Nabu Casa’s official FAQ, Home Assistant Green does not include any onboard wireless radios — so no built‑in Zigbee, Thread, Wi‑Fi, or Bluetooth.
If you need those features, you can add them through external hardware:
-
Zigbee / Thread → Use a , which supports both protocols via USB.
-
Bluetooth → Either plug in a compatible USB Bluetooth adapter for local use, or set up an ESPHome device as a Bluetooth proxy.
-
Wi‑Fi → Not provided internally; you’d need to connect via Ethernet or use external Wi‑Fi networking hardware.
This design keeps the base unit streamlined, while letting you pick only the radio modules you actually need. That’s often useful if you want to avoid interference or tailor your setup to a specific smart‑home stack.
Can I connect a Wi‑Fi dongle?
It’s not recommended. Your smart home controller should remain reliably connected via Ethernet at all times for stability.
Can I connect a Z‑Wave or Zigbee USB dongle?
Yes. You can attach both Z‑Wave and Zigbee sticks via USB. For Zigbee, Home Assistant Connect ZBT‑1 is a supported option.
FAQ - General
Can I disable the Ethernet status lights / Ethernet LEDs on Green?
No. The Ethernet port LED cannot be disabled (device LEDs can be toggled; see the LED sections above).
Why is there an optional CR2032 battery? Do I need to add one?
The optional CR2032 coin‑cell battery in the Home Assistant Green is there to keep the real‑time clock running when the device isn’t powered, so it can remember the date and time even while unplugged.
You only really need to add one if you expect the Green to boot without internet access for an extended period — for example, in an isolated network or an offline installation — because without a network connection it can’t sync the clock from online time servers.
If you do install it, make sure the positive (+) side faces up, so the “+” mark is visible in the battery holder. This way, the clock stays accurate even if it’s powered down for a while.