openelab.de
 openelab.com


-
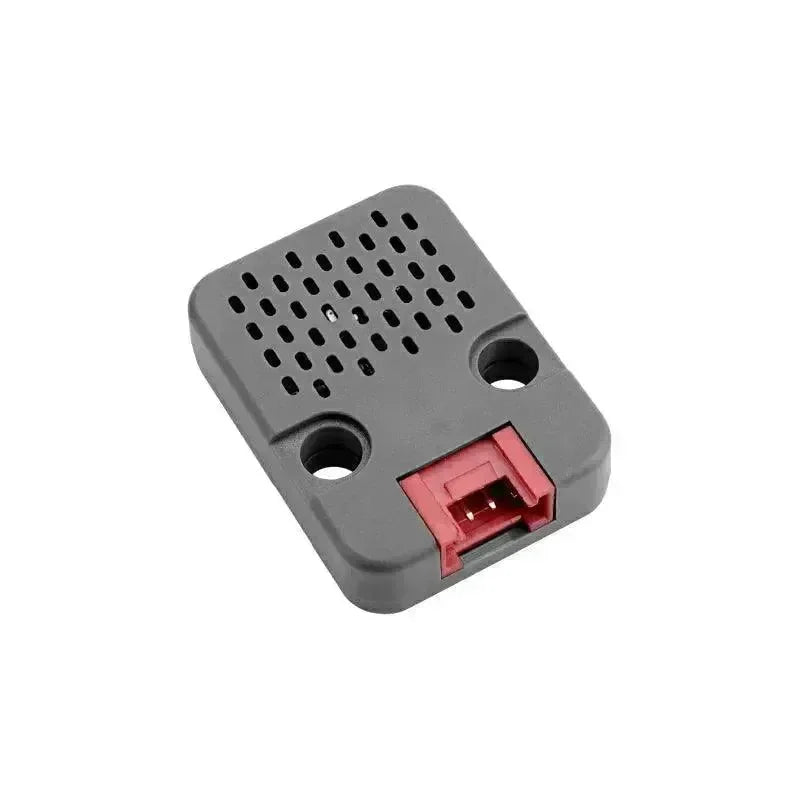
Select an IR module: For example, the Grove IR Receiver module.
-
Hardware connection: Use the Grove interface or jumper wires to connect the IR module to the appropriate GPIO pins on the M5StickC Plus2.
-
Software support: Write code in Arduino or MicroPython to read the IR signals. Arduino libraries, such as IRremote, can easily decode common IR protocols (e.g., NEC protocol).

Key Features of the Infrared Function
/**
 * @file ir_nec.ino
 * @author SeanKwok (shaoxiang@m5stack.com)
 * @brief M5StickCPlus2 IR NEC test
 * @version 0.1
 * @date 2023-12-09
 *
 *
 * @Hardwares: M5StickCPlus2
 * @Platform Version: Arduino M5Stack Board Manager v2.0.9
 * @Dependent Library:
 * M5GFX: https://github.com/m5stack/M5GFX
 * M5Unified: https://github.com/m5stack/M5Unified
 * M5StickCPlus2: https://github.com/m5stack/M5StickCPlus2
 * IRremote: https://github.com/Arduino-IRremote/Arduino-IRremote
 */

#define DISABLE_CODE_FOR_RECEIVER  // Disables restarting receiver after each
                                   // send. Saves 450 bytes program memory and
                                   // 269 bytes RAM if receiving functions are
                                   // not used.
#define SEND_PWM_BY_TIMER
#define IR_TX_PIN 19


uint8_t sCommand = 0x34;
uint8_t sRepeats = 0;

void setup() {
    auto cfg = M5.config();

    //To understand the underlying logic of the initialization with begin(), you can refer to the Dependent Library.
    StickCP2.begin(cfg);

    //Display rotation directions
    StickCP2.Display.setRotation(1);

    //  The color of the text displayed on the screen.
    StickCP2.Display.setTextColor(GREEN);

    //Text alignment middle_center means aligning the center of the text to the specified coordinate position.
    StickCP2.Display.setTextDatum(middle_center);

    //Font Styles
    StickCP2.Display.setTextFont(&fonts::Orbitron_Light_24);

    //Font size
    StickCP2.Display.setTextSize(1);

    IrSender.begin(DISABLE_LED_FEEDBACK);  // Start with IR_SEND_PIN as send pin
    IrSender.setSendPin(IR_TX_PIN);//Infrared Signal Transmit Pin Settings
}

void loop() {
    Serial.println();//Print a blank line to format the output and make the following information clearer.
    Serial.print(F('Send now: address=0x1111, command=0x'));//Print a string.
    Serial.print(sCommand, HEX);//Display in hexadecimal format.
    Serial.print(F(', repeats='));//Indicate the number of repeated transmissions.
    Serial.print(sRepeats);//The number of times the command is sent.
    Serial.println();//Print another blank line to make the output more organized.

    StickCP2.Display.clear();//Update the screen display.

    //drawString A method used to draw a string at a specified position.
    StickCP2.Display.drawString('IR NEC SEND', StickCP2.Display.width() / 2,
                                StickCP2.Display.height() / 2 - 40);

    StickCP2.Display.drawString('ADDR:0x1111', StickCP2.Display.width() / 2,
                                StickCP2.Display.height() / 2);

    StickCP2.Display.drawString('CMD:0x' + String(sCommand, HEX),
                                StickCP2.Display.width() / 2,
                                StickCP2.Display.height() / 2 + 40);

    Serial.println(F('Send standard NEC with 16 bit address'));

    StickCP2.Display.fillCircle(32, 105, 8, GREEN);//Draw a circle.

    IrSender.sendNEC(0x1111, sCommand, sRepeats);//Send an infrared signal following the NEC protocol.
    // IrSender.sendOnkyo(0x1111, 0x2223, sRepeats);//Send an infrared signal following the Onkyo protocol.
    /*
     * Increment send values
     */
    sCommand += 1;//Increment the command value.
    delay(500);//Delay for 500 milliseconds.
    StickCP2.Display.fillCircle(32, 105, 8, YELLOW);//Draw a filled circle.
    delay(500);
}
1. IrSender.begin(DISABLE_LED_FEEDBACK);
IrSender.begin(DISABLE_LED_FEEDBACK); // Start with IR_SEND_PIN as send pin
begin method of the IrSender object to initialize the infrared transmission function.-
DISABLE_LED_FEEDBACK: This is a parameter used to disable LED feedback. If feedback is enabled, the LED will blink while transmitting infrared signals.
IrSender will use a preset infrared transmission pin (such as IR_SEND_PIN) to send infrared signals. This line of code activates the infrared transmitter and prepares it to send infrared signals.2. IrSender.setSendPin(IR_TX_PIN);
IrSender.begin(DISABLE_LED_FEEDBACK); // Start with IR_SEND_PIN as send pin
Call the setSendPin method of the IrSender object to set the infrared signal transmission pin to IR_TX_PIN.
-
IR_TX_PINis a defined pin number that specifies the exact pin used to transmit infrared signals.
By using this line of code, you can customize the infrared transmission pin instead of using the default one. This is especially useful when there are changes in hardware connections or pin mapping.
3. Serial.print(F('Send now: address=0x1111, command=0x'));
                Serial.println();//Print a blank line to format the output and make the following information clearer.
                Serial.print(F('Send now: address=0x1111, command=0x'));//Print a string.
                Serial.print(sCommand, HEX);//Display in hexadecimal format.
                Serial.print(F(', repeats='));//Indicate the number of repeated transmissions.
                Serial.print(sRepeats);//The number of times the command is sent.
                Serial.println();//Print another blank line to make the output more organized.
-
Use
Serial.print()to print the string 'Send now: address=0x1111, command=0x'. TheF()macro is utilized here to store the string in Flash memory, helping to conserve RAM.
StickCP2.Display.drawString(' ', , );
                //drawString A method used to draw a string at a specified position.
                StickCP2.Display.drawString('IR NEC SEND', StickCP2.Display.width() / 2,
                                            StickCP2.Display.height() / 2 - 40);

                StickCP2.Display.drawString('ADDR:0x1111', StickCP2.Display.width() / 2,
                                            StickCP2.Display.height() / 2);

                StickCP2.Display.drawString('CMD:0x' + String(sCommand, HEX),
                                            StickCP2.Display.width() / 2,
                                            StickCP2.Display.height() / 2 + 40);
Display 'IR NEC SEND' using the drawString method to render the string at a specified position on the screen.
-
StickCP2.Display.width() / 2: This ensures the string is centered horizontally on the display. -
StickCP2.Display.height() / 2 - 40: This places the string 40 pixels above the vertical center of the screen.
drawString method to show the address information.-
StickCP2.Display.width() / 2: Centers the text horizontally on the screen. -
StickCP2.Display.height() / 2: Centers the text vertically, placing it right in the middle of the display.
Display command information by rendering the string 'CMD:0x' along with the hexadecimal representation of the sCommand variable.
-
String(sCommand, HEX): Converts thesCommandvariable to a hexadecimal string. -
StickCP2.Display.width() / 2: Centers the text horizontally on the display. -
StickCP2.Display.height() / 2 + 40: Places the text 40 pixels below the vertical center of the screen.
5. Serial.println(F('Send standard NEC with 16 bit address'));
                Serial.println(F('Send standard NEC with 16 bit address'));

                StickCP2.Display.fillCircle(32, 105, 8, GREEN);//Draw a circle.
Serial.println() to print information to the **serial monitor**, adding a newline at the end to ensure the next output starts on a new line.-
F('Send standard NEC with 16 bit address'): TheF()macro stores the string 'Send standard NEC with 16 bit address' in Flash memory (program storage) instead of **RAM**, helping to conserve memory. -
The output 'Send standard NEC with 16 bit address' indicates that a standard NEC protocol infrared signal is being transmitted with a **16-bit address**.
6. IrSender.sendNEC()
                IrSender.sendNEC(0x1111, sCommand, sRepeats);//Send an infrared signal following the NEC protocol.
                // IrSender.sendOnkyo(0x1111, 0x2223, sRepeats);//Send an infrared signal following the Onkyo protocol.
                /*
                 * Increment send values
                 */
0x1111: This is the address of the infrared signal, representing a 16-bit address value used to identify the target device or command destination.sCommand: This is the command value to be sent. It can be an 8-bit or 16-bit value, specifying the exact operation the target device should perform.sRepeats: Indicates the number of times the signal is repeated, usually to enhance signal reliability or meet specific requirements of the device being controlled. IrSender.sendNEC(0x1111, sCommand, sRepeats);//Send an infrared signal following the NEC protocol.
// IrSender.sendOnkyo(0x1111, 0x2223, sRepeats);//Send an infrared signal following the Onkyo protocol.
/*
* Increment send values
*/
-
0x1111: This is the device address of the infrared signal, used to identify a specific device. -
0x2223: This is the command code sent to the device, specifying the operation to be performed. -
sRepeats: Represents the number of times the signal is repeated, typically to ensure signal reliability or meet the requirements of the target device.
Easy Programming
Flexible Application Scenarios
Preconfigured Infrared Pin