So klonen und erweitern Sie WLAN mit M5StickC Plus2
23 Oct 2024
0 Kommentare
Der M5StickC Plus2 ist ein vielseitiges IoT-Entwicklungsboard basierend auf dem ESP32-Chip. Eine seiner praktischen Funktionen ist das Wi-Fi-Klonen, das es dem Gerät ermöglicht, Wi-Fi-Netzwerke zu scannen, zu verbinden und zu konfigurieren, ohne dass bei jeder Bereitstellung eine manuelle Neukonfiguration erforderlich ist. Nachfolgend finden Sie eine erweiterte Schritt-für-Schritt-Anleitung, die Ihnen beim effizienten Klonen von WLAN-Netzwerken mit dem M5StickC Plus2 hilft >.
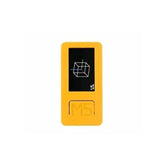
Schritt 1: Identifizieren Sie die Tasten auf dem M5StickC Plus2
-
Ein-/Ausschalttaste: Schaltet das Gerät ein oder aus.
-
M5-Taste (Bestätigungstaste): Bestätigt die Auswahl und blättert durch die Menüs.
-
Auf-/Ab-Tasten: Navigieren Sie durch Optionen wie verfügbare WLAN-Netzwerke.
Wenn Sie sich mit diesen Tasten vertraut machen, stellen Sie einen reibungslosen Betrieb während des gesamten Einrichtungsvorgangs sicher.


Schritt 2: Schalten Sie das Gerät ein und greifen Sie auf das Anzeigemenü zu
-
Drücken Sie die Power-Taste, um den M5StickC Plus2 einzuschalten.
-
Mit der M5-Taste blättern Sie durch das Anzeigemenü.
-
Stellen Sie sicher, dass auf dem Display die WLAN-Optionen angezeigt werden, bevor Sie fortfahren.
Bei jeder Aktion müssen Sie die Taste M5 drücken, um die Auswahl zu bestätigen und fortzufahren.


Schritt 3: Suchen Sie nach verfügbaren Wi-Fi-Netzwerken
-
Nach dem Zugriff auf das WLAN-Menü sucht M5StickC Plus2 nach WLAN-Netzwerken in der Nähe.
-
Verwenden Sie die Auf-/Ab-Tasten, um die Liste der Netzwerke zu durchsuchen.
-
Wählen Sie das gewünschte Netzwerk zum Klonen aus, indem Sie die Taste M5 drücken.

Schritt 4: Wählen Sie die Klon-Option
-
Nachdem Sie das Wi-Fi-Netzwerk ausgewählt haben, wählen Sie die 'Clone-Option' aus dem Menü.
-
Bestätigen Sie Ihre Auswahl durch Drücken der M5-Taste.
-
Das Gerät wird jetzt eine IP Adresse für den nächsten Schritt ausgeben.


Schritt 5: Verbinden Sie Ihr Smartphone mit dem M5StickC Plus2
-
Öffnen Sie die WLAN-Einstellungen auf Ihrem Smartphone.
-
Suchen Sie nach dem Netzwerk (SSID) des M5StickC und verbinden Sie sich damit.
-
Wenn ein Passwort erforderlich ist, geben Sie das Standardpasswort ein (siehe Dokumentation, falls erforderlich).

Schritt 6: Protokoll mit Ihrem Google-Konto anmelden
-
Sobald die Verbindung hergestellt ist, öffnen Sie Ihren Browser auf dem Smartphone.
-
Der M5StickC fordert Sie auf, sich mit einem Google-Konto anzumelden.
-
Geben Sie Ihre Google-Anmeldeinformationen ein, um fortzufahren und alle erforderlichen Berechtigungen zu bestätigen.

Schritt 7: Greifen Sie zur endgültigen Konfiguration auf den Browser zu
-
Nach der Anmeldung zeigt das Gerät eine Konfigurationsseite an.
-
Öffnen Sie den Browser auf Ihrem Telefon, um auf die zuvor angegebene IP-Adresse zuzugreifen.
-
Wenn die automatische Umleitung fehlschlägt, geben Sie die IP-Adresse manuell in die Adressleiste Ihres Browsers ein.


Schritt 8: Fehlerbehebung, wenn die Verbindung fehlschlägt
Wenn die Verbindung fehlschlägt, gehen Sie folgendermaßen vor:
-
Deaktivieren Sie mobile Daten auf Ihrem Smartphone, um Konflikte zu vermeiden.
-
Starten Sie den M5StickC neu und versuchen Sie erneut, nach WLAN zu suchen.
-
Stellen Sie sicher, dass Sie sich in Reichweite des ausgewählten WLAN-Netzwerks befinden.

Schritt 9: Verifizieren die Endergebnisse
-
Nach erfolgreicher Verbindung zeigt der M5StickC Plus2 den Verbindungsstatus auf seinem Bildschirm an.
-
Trennen Sie Ihr Telefon vom M5StickC und die geklonten WLAN-Anmeldeinformationen sind jetzt für andere IoT-Geräte verfügbar.
-
Testen Sie die Verbindung mit anderen Geräten, um sicherzustellen, dass die Anmeldeinformationen korrekt geklont wurden.

Abschluss
Der M5StickC Plus2 Wi-Fi-Klonvorgang ist unkompliziert, insbesondere mit dieser detaillierten Anleitung. Indem Sie diese Schritte befolgen – nach WLAN suchen, sich bei Google anmelden und auf die Konfigurationsseite zugreifen – können Sie WLAN-Anmeldeinformationen schnell klonen und Ihre IoT-Einrichtungen optimieren. Mit seinem kompakten Design und seiner leistungsstarken Funktionalität vereinfacht der M5StickC Plus2 die Netzwerkverwaltung und Gerätebereitstellung für Entwickler und Bastler gleichermaßen.


Hinterlassen Sie einen Kommentar
Alle Blog-Kommentare werden vor der Veröffentlichung geprüft