The LILYGO T3 S3 LoRa Development Board is a powerful and compact platform designed for building wireless IoT applications. It is based on the ESP32-S3 chip, which integrates both Wi-Fi and Bluetooth 5.0 functionality, and features LoRa wireless communication for long-range connectivity. The board is equipped with a 0.96-inch OLED display for real-time data visualization. This tutorial will guide you through how to get started with the LILYGO T3 S3 Development Board, including hardware setup, development environment configuration, code uploading, and usage examples.
LILYGO T3 S3 LoRa Development Board Overview
The LILYGO T3 S3 Development Board is a wireless communication platform based on the ESP32-S3 chip. It integrates Wi-Fi, Bluetooth 5.0, and a LoRa module, supporting multiple frequency bands such as 2.4GHz, 868MHz, and 915MHz. The key features of this development board include:
-
ESP32-S3 Chip: Supports both Wi-Fi and Bluetooth 5.0.
-
LoRa Communication: Built-in SX1280, SX1276, and SX1262 LoRa modules.
-
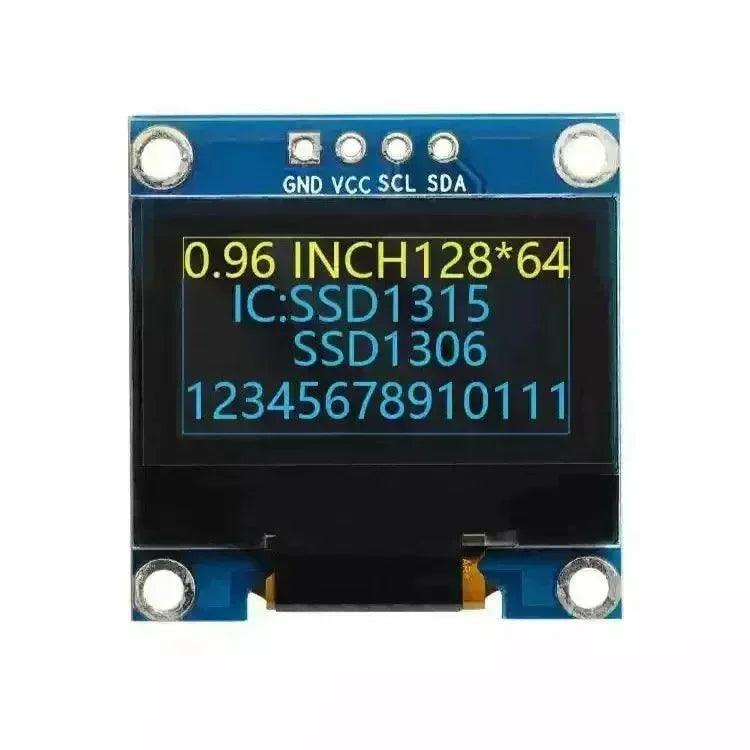
OLED Display: A 0.96-inch OLED display for real-time data visualization.
-
Versatility: Ideal for environmental monitoring, smart agriculture, remote sensing, and smart city applications.
How to Get Started with the LILYGO T3 S3 Development Board
The LILYGO T3 S3 Development Board is easy to use. Here’s a quick guide to get you started, covering the necessary steps to connect it to the Arduino IDE, upload code, and run your first project.
-
Install the Development Environment
Before using the LILYGO T3 S3 Development Board, you need to install the Arduino IDE and configure it to support the ESP32 boards.
-
Install the Arduino IDE: Download and install the latest version of the Arduino IDE.
-
Add ESP32 Support: Open the Arduino IDE, go to File > Preferences, and in the "Additional Boards Manager URLs" field, enter the following URL:
https://dl.espressif.com/dl/package_esp32_index.json
✔ Copied!
Then, go to Tools > Boards > Boards Manager, search for "ESP32", and click Install to add ESP32 support.
-
Select the Development Board: After installation, go to Tools > Board, and select LILYGO T3 S3 or a compatible ESP32 board model.
-
Connect the LILYGO T3 S3 Development Board
Use a standard USB cable to connect the LILYGO T3 S3 Development Board to your computer. Make sure the board is correctly connected to the selected port.
-
Open the Arduino IDE and ensure the board is properly detected.
-
In Tools > Port, select the correct port that corresponds to the connected board.
-
Upload Example Code
You can test the functionality of your LILYGO T3 S3 Development Board by uploading example code. For instance, you can test LoRa communication, OLED display, or Wi-Fi connectivity.
-
Open Arduino IDE, go to File > Examples, and select an appropriate example (such as LoRa communication or OLED display).
-
Click Upload in the Arduino IDE to upload the code to the LILYGO T3 S3 Development Board.
-
Use LoRa Communication
The LILYGO T3 S3 Development Board comes with LoRa modules (SX1280, SX1276, SX1262), enabling long-range communication on various frequency bands. You can set the frequency and communication parameters as needed.
-
In the code, configure the transmission and reception frequencies using the LoRa library.
-
Ensure that the transmitting and receiving devices are set to the same frequency and parameters.
-
Use the OLED Display
The LILYGO T3 S3 Development Board includes a 0.96-inch OLED display that can be used for real-time data visualization.
-
Connect the OLED display via the I2C interface to the development board.
-
Use the
Adafruit_SSD1306andAdafruit_GFXlibraries to control the display and show text, graphics, or dynamic data.
-
Enable Wi-Fi and Bluetooth Functionality
The ESP32-S3 chip integrates Wi-Fi and Bluetooth 5.0, enabling the T3 S3 board to support remote communication and device pairing. You can write code to connect to a Wi-Fi network or communicate with Bluetooth devices.
-
In the code, configure the Wi-Fi or Bluetooth module to handle connectivity and communication.
Frequently Asked Questions (FAQ)
-
How do I connect the LILYGO T3 S3 Development Board to a Wi-Fi network?
To connect to Wi-Fi, you need to add Wi-Fi connection code in your sketch, as shown below:
#include

const char* ssid = "Your_SSID";
const char* password = "Your_PASSWORD";

void setup() {
  Serial.begin(115200);
  WiFi.begin(ssid, password);

  while (WiFi.status() != WL_CONNECTED) {
    delay(1000);
    Serial.println("Connecting to WiFi...");
  }
  Serial.println("WiFi connected!");
}

void loop() {
  // Add your code here
}
✔ Copied!
Replace
Your_SSID and Your_PASSWORD with your Wi-Fi network credentials. Upload the code to establish the Wi-Fi connection.-
How do I use LoRa to send and receive data?
You can use the
LoRa library to implement LoRa communication. Here’s an example for sending and receiving data:-
Transmitter Code:
#include
#include

void setup() {
  Serial.begin(115200);
  LoRa.begin(915E6);  // Set frequency to 915MHz
}

void loop() {
  LoRa.beginPacket();
  LoRa.print("Hello LoRa!");
  LoRa.endPacket();
  delay(1000);
}
✔ Copied!
-
Receiver Code:
#include
#include

void setup() {
  Serial.begin(115200);
  LoRa.begin(915E6);  // Set frequency to 915MHz
}

void loop() {
  int packetSize = LoRa.parsePacket();
  if (packetSize) {
    while (LoRa.available()) {
      String received = LoRa.readString();
      Serial.println(received);
    }
  }
}
✔ Copied!
Ensure that both the transmitter and receiver are set to the same frequency.
-
How do I use the OLED display to show data?
The 0.96-inch OLED display can be connected to the LILYGO T3 S3 Development Board via the I2C interface. You can use libraries like Adafruit_SSD1306 and Adafruit_GFX to control the display. Here’s an example of displaying text on the OLED screen:
#include
#include
#include

#define SCREEN_WIDTH 128
#define SCREEN_HEIGHT 64
Adafruit_SSD1306 display(SCREEN_WIDTH, SCREEN_HEIGHT, &Wire, -1);

void setup() {
  if (!display.begin(SSD1306_I2C_ADDRESS, 4)) {
    Serial.println(F("SSD1306 allocation failed"));
    for (;;);
  }
  display.display();
  delay(2000);  // Wait for 2 seconds

  display.clearDisplay();
  display.setTextSize(1);
  display.setTextColor(SSD1306_WHITE);
  display.setCursor(0,0);
  display.print("Hello, LILYGO T3 S3!");
  display.display();
}

void loop() {
  // You can update the display content here
}
✔ Copied!
-
How do I choose the correct LoRa frequency?
The LILYGO T3 S3 Development Board supports multiple frequencies such as 2.4GHz, 868MHz, and 915MHz. Choose the frequency based on your region’s regulations. Be sure to check local laws before selecting a frequency for your application.
-
Does the LILYGO T3 S3 support multiple IoT applications?
Yes, the LILYGO T3 S3 Development Board is highly versatile and supports a wide range of IoT applications such as environmental monitoring, smart agriculture, remote sensing, and smart city solutions.
-
Can I use the LILYGO T3 S3 Development Board for Wi-Fi and Bluetooth communication?
Yes, the LILYGO T3 S3 Development Board is based on the ESP32-S3 chip, which supports both Wi-Fi and Bluetooth 5.0. You can simultaneously use LoRa wireless communication, Wi-Fi, and Bluetooth in the same project, maximizing the board's multifunctional advantages.
-
How does the LILYGO T3 S3 Development Board communicate with other LoRa devices?
The LILYGO T3 S3 Development Board uses LoRa modules (such as SX1280, SX1276, SX1262) for long-range wireless communication. You can configure multiple boards to act as transmitters and receivers for wireless communication. Ensure that the devices are operating on the same frequency to exchange data effectively.
-
Does the LILYGO T3 S3 Development Board support development environments other than Arduino IDE?
While the LILYGO T3 S3 Development Board is primarily supported by the Arduino IDE, it is also compatible with other development environments such as PlatformIO. You can choose the development platform that suits you best, as long as the appropriate ESP32 support libraries are installed.
-
How do I debug my LILYGO T3 S3 Development Board code?
During debugging, you can use the Serial Monitor to output debug information. Initialize the serial communication with
Serial.begin() and print logs to check your code logic and hardware connections. If you encounter communication issues, verify LoRa module connections, frequency settings, and ensure the correct wiring.-
What is the power consumption of the LILYGO T3 S3 Development Board?
The LILYGO T3 S3 Development Board is designed with low power consumption, especially suitable for IoT applications. While LoRa communication can consume more power, LoRa's low-power nature makes it ideal for long-duration deployments. You can further reduce power consumption by utilizing sleep modes and optimizing communication intervals.
-
Does the LILYGO T3 S3 Development Board support over-the-air firmware updates (OTA)?
Yes, the LILYGO T3 S3 Development Board supports over-the-air (OTA) firmware updates. This feature allows you to upload new firmware versions to the board via Wi-Fi, eliminating the need for physical USB connections. OTA updates are particularly useful for large-scale deployments and remote maintenance.

