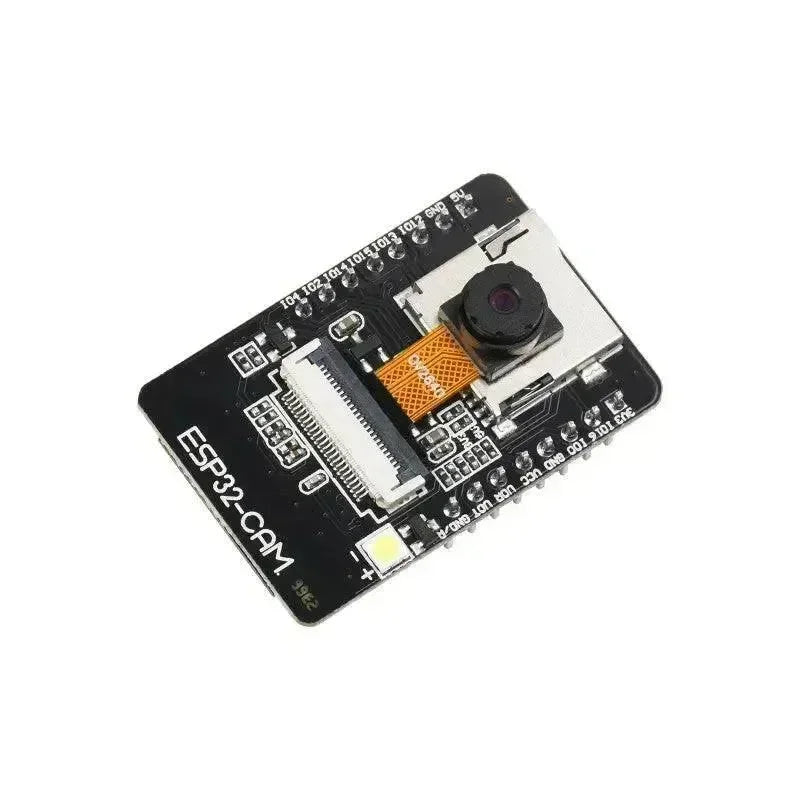
⚡ Flash dei dispositivi ESP32 con firmware Meshtastic
🔧 Il flash dei dispositivi ESP32 con il firmware Meshtastic può essere effettuato con diversi metodi. Il metodo più raccomandato è il 🌐 Web Flasher, che funziona con browser Chrome o Edge. È 👌 facile da usare ed ideale per principianti che vogliono flashare rapidamente le loro schede ESP32. Lo 💻 script CLI è un metodo manuale per il flash del firmware ed è più adatto per utenti avanzati familiari con gli strumenti da linea di comando. Se sia il Web Flasher che lo script CLI falliscono, usare un 🔌 adattatore seriale esterno è un'opzione, ma dovrebbe essere tentata solo come ultima risorsa ⚠️ a causa della sua complessità.
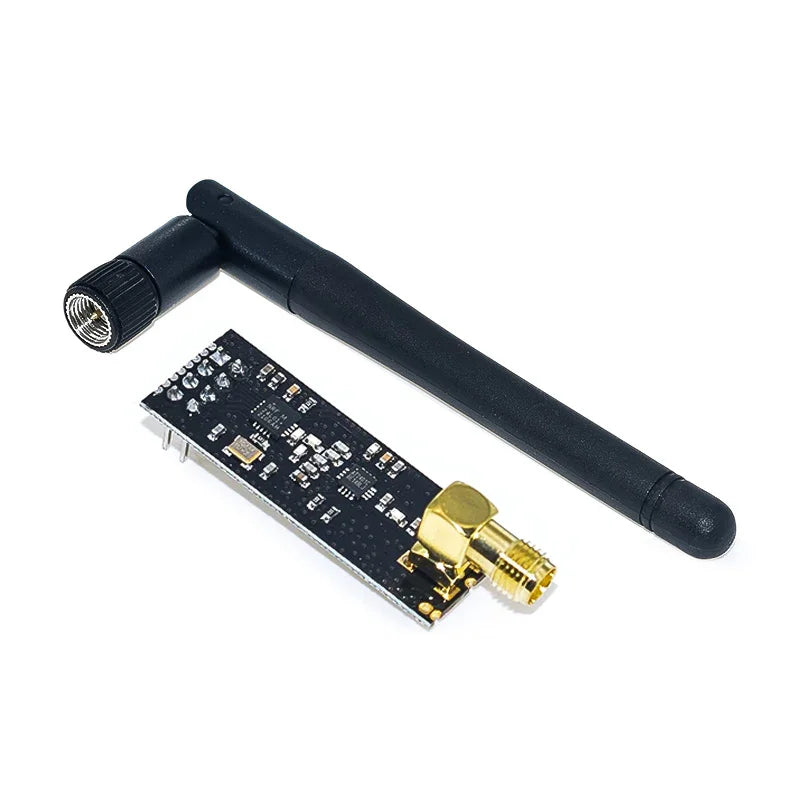
📡 Prima di accendere la tua radio Meshtastic basata su ESP32, collega sempre l'antenna. Operare senza antenna può danneggiare il chip radio. Per aggiornare il client web Meshtastic su meshtastic.local, è necessario un reset completo e una reinstallazione del dispositivo. Questo garantisce di ottenere la ultima interfaccia web inclusa. Se vuoi mantenere le tue impostazioni, 💾 esporta la configurazione prima di reinstallare e importala dopo.
⚙️ Il flash del firmware ESP32 è un passo fondamentale per configurare il tuo dispositivo Meshtastic. Che tu usi il 🌐 Web Flasher, lo 💻 script CLI o il 🔌 adattatore seriale, assicurati di seguire le precauzioni di sicurezza e scegliere il metodo che meglio si adatta al tuo livello di esperienza.
🚀 Flash del Dispositivo
-
🔗 Collega il tuo dispositivo
-
🌍 Visita flasher.meshtastic.org *richiede il browser Chrome o Edge
-
📖 Seguire le istruzioni

🔧 Collegare e Configurare il Dispositivo
💻 Flash del Firmware tramite CLI
🔍 Verifica della connettività
📡 Prima di eseguire il flashing del tuo dispositivo ESP32, verifica la connettività con il dispositivo che stai per flashare. Segui i passaggi indicati di seguito per controllare la connessione del dispositivo e, se necessario, installa i driver USB appropriati per la tua scheda ESP32. Se devi installare i driver, ricorda di 🔄 riavviare il computer successivamente per confermare che l'installazione del driver sia completa.
⚠️ NOTA: La scheda T-Beam 0.7 è una versione precedente della scheda T-Beam ESP32. A causa di modifiche progettuali nelle iterazioni successive, questa scheda richiede un file firmware specifico diverso da quelli usati dalle altre versioni della scheda T-Beam. Assicurati di selezionare il firmware corretto quando esegui il flashing del tuo ESP32 T-Beam 0.7 per garantire il corretto funzionamento.
-
📂 Usa firmware-tbeam0.7-X.X.X.xxxxxxx.bin per il T-Beam 0.7.
-
❌ firmware-tbeam-X.X.X.xxxxxxx.bin non è compatibile.
📜 Istruzioni per l'interfaccia a riga di comando
🛠 Installa il software prerequisito
🐧 Linux
|
🐍 python3 --version 📦 pip3 --version |
|
🔄 sudo apt-get update ⬇️ sudo apt-get install python3 |
⬇️ sudo apt-get install python3-pip
|
⬇️ pip3 install --upgrade esptool
|
🍏 MacOS
🔎 brew -v
|
|
🐍 python3 --version 📦 pip3 --version |
⬇️ brew install python3
|
📦 pip3 -v
|
⬇️ pip3 install --upgrade esptool
|
🪟 Windows
-
⬇️ Scarica e installa Python. Durante il processo di installazione, assicurati di selezionare l'opzione Aggiungi Python X.Y al PATH.
-
⬇️ Scarica e installa Git Bash (o un altro shell adatto), ed esegui tutti i comandi successivi da quel shell.
|
🐍 py --version 📦 pip --version |
⬇️ pip3 install --upgrade esptool
|
🔗 Verifica la connettività con il Chip
-
🐧 Su Linux e macOS, potresti dover dichiarare esplicitamente esptool come .py script. Usa il comando esptool.py chip_id per fare questo, a seconda del tuo ambiente.
-
🪟 Su Windows, devi dichiarare esplicitamente esptool come .py script usando il comando esptool.py chip_id per garantire il corretto funzionamento.
💻 Comando
📝 esptool chip_id
|
📤 Output previsto
|
✅ # Dovresti vedere un risultato simile a questo: 💻 mydir$ esptool chip_id 🔧 esptool.py v2.6 🔍 Trovate 2 porte seriali 🔌 Porta seriale /dev/ttyUSB0 ⏳ Connessione in corso.... 🔎 Rilevamento tipo di chip... ESP32 📡 Il chip è ESP32D0WDQ6 (revisione 1) ✨ Caratteristiche: WiFi, BT, Dual Core, 240MHz, calibrazione VRef in efuse, Schema di codifica Nessuno 🔑 MAC: 24:6f:28:b5:36:71 ⬆️ Caricamento dello stub... ▶️ Esecuzione dello stub... ✅ Stub in esecuzione... ⚠️ Attenzione: ESP32 non ha Chip ID. Lettura 🔑 MAC invece. MAC: 24:6f:28:b5:36:71 🔄 Reset hard tramite pin RTS in corso... |
⬇️ Scarica il Firmware
-
🌐 Vai alla Pagina Download Meshtastic per ottenere il firmware più recente.
-
📂 Scorri verso il basso fino alla sezione Firmware e scegli una delle seguenti opzioni in base alle tue preferenze:
-
✅ Scarica Stable: Per versioni stabili e ben testate.
-
🧪 Scarica Alpha: per versioni più recenti e sperimentali che includono le funzionalità più recenti.
-
📄 Una volta reindirizzato alla pagina di rilascio GitHub, scorri verso il basso fino alla sezione Assets e espandila.
-
🔎 Identifica il firmware appropriato per il tuo dispositivo in base alla sua architettura (ad esempio, firmware-esp32s3 per dispositivi basati su ESP32-S3 come l'Heltec V3).
-
💾 Scarica il file e annota la sua posizione sul tuo sistema, che di solito si trova nella tua ~/Downloads cartella.
📂 Accedi alla Directory del Firmware
📂 cd ~/Downloads/firmware-esp32s3-X.X.X.xxxxxxx/
|
⚡ Installa o Aggiorna il Firmware
📌 Nota prima di iniziare:
⚠️ Fai estrema attenzione a installare il file firmware corretto per la tua scheda ESP32. In particolare, il molto usato radio T-BEAM di TTGO non è chiamato TTGO-Lora, che è una diversa scheda ESP32. Pertanto, non flashare il build firmware TTGO-Lora su un T-BEAM, poiché non funzionerà correttamente e potrebbe causare problemi al tuo dispositivo ESP32.
❌ Se installi il firmware sbagliato per la tua scheda ESP32, il processo di flashing potrebbe sembrare completato con successo, ma il dispositivo potrebbe diventare non rispondente, mostrando uno schermo vuoto se presente. Assicurati sempre di flashare la versione corretta del firmware per il tuo specifico hardware ESP32.
⚡ Nota che mentre questi dispositivi basati su ESP32 sono generalmente robusti e il danneggiamento non è garantito, c'è il rischio di danni al modulo radio integrato e alle periferiche se le direzioni dei pin GPIO sono configurate in modo errato durante il flash del firmware. La selezione corretta del firmware è fondamentale per mantenere la funzionalità e la sicurezza del tuo dispositivo ESP32 Meshtastic.
🐧 Linux & 🍏 macOS
💻 ./device-install.sh -f firmware-BOARD-VERSION.bin
|
⬇️ Scarica il Firmware
-
🌐 Vai alla Pagina Download Meshtastic per ottenere il firmware più recente.
-
📂 Scorri verso il basso fino alla sezione Firmware e scegli una delle seguenti opzioni:
-
✅ Scarica Stable: Per versioni stabili e ben testate.
-
🧪 Scarica Alpha: Per versioni sperimentali con le ultime funzionalità.
-
📄 Nella pagina di rilascio GitHub, scorri verso il basso fino ad Assets e espandila.
-
🔎 Identifica il firmware corretto per il tuo dispositivo (ad es. firmware-esp32s3 per schede ESP32-S3).
-
💾 Scarica il file e annota la sua posizione (di solito ~/Downloads).
📂 Accedi alla Directory del Firmware
| 📂 cd ~/Downloads/firmware-esp32s3-X.X.X.xxxxxxx/ |
⚡ Installa o Aggiorna il Firmware
📌 Importante:
⚠️ Installa sempre il firmware corretto per la tua scheda ESP32. Non confondere T-BEAM con TTGO-Lora.
❌ Il firmware sbagliato può essere flashato ma lasciare il dispositivo non rispondente (schermo vuoto).
⚡ Configurazioni GPIO errate durante il flashing possono danneggiare il modulo radio. Scegli con attenzione.
🐧 Linux & 🍏 macOS
| 💻 ./device-install.sh -f firmware-BOARD-VERSION.bin |
| 💻 ./device-update.sh -f firmware-BOARD-VERSION-update.bin |
🪟 Windows
| 💻 esptool.exe --chip esp32 write_flash -z 0x1000 firmware-BOARD-VERSION.bin |
| 💻 esptool.exe --chip esp32 write_flash -z 0x1000 firmware-BOARD-VERSION-update.bin |
💻 device-install.bat -f firmware-BOARD-VERSION.bin
|
💻 device-update.bat -f firmware-BOARD-VERSION-update.bin
|
🔌 Collega e configura il dispositivo
🔧 Flashing con un adattatore seriale esterno
⚙️ Processo di flashing
-
⚠️ A causa della carenza di chip in corso, dispositivi recentemente acquisiti come il TTGO T-Beam potrebbero essere dotati di chip USB to Serial adapter legacy o non standard, che possono risultare inaffidabili in alcune situazioni.
-
❌ Alcuni dispositivi possono presentare chip USB to Serial difettosi, causando problemi di comunicazione.
-
🔗 Dispositivi specifici, come il Hydra (target Meshtastic-DIY)
🔌 Adattatori seriali USB
🛠 Sono disponibili numerose opzioni di adattatori ESP32 sul mercato, ma è consigliabile scegliere un adattatore che utilizzi il chip Silicon Labs CP2102, noto per la sua affidabilità e come standard industriale per il flashing ESP32. L'adattatore basato su CP2102 garantisce una stabile comunicazione USB-seriale, essenziale per un flashing del firmware di successo.
🔌 Inizia collegando il adattatore CP2102 al tuo computer senza collegare alcun dispositivo ESP32 in questo momento. Assicurati che i necessari driver USB per l'adattatore siano installati sul tuo computer. Per i utenti Windows, i corretti driver CP2102 dovrebbero generalmente installarsi automaticamente, consentendo un agevole rilevamento del dispositivo ESP32 e un affidabile upload del firmware.

Collegare l'adattatore al dispositivo
-
🔄 Collega il pin RX dell'adattatore al pin TX del dispositivo.
-
🔄 Collega il pin TX dell'adattatore al pin RX del dispositivo.
-
⚡ Collega un pin GND dell'adattatore al pin GND del dispositivo.
-
🔋 Collega il pin 5V dell'adattatore al pin 5V del dispositivo (come illustrato) oppure il pin 3.3V dell'adattatore al pin 3.3V del dispositivo.
-
🟢 Collega GPIO 0 a GND sul dispositivo con un jumper. (Questo metterà il dispositivo in modalità flash all'accensione.) Esempio di cablaggio con un T-Beam.

-
🔌 Collega il dispositivo a una porta USB del computer.
-
❎ Rimuovi il jumper che collega GPIO 0 a GND.

💾 Flash del dispositivo

🛠 Risoluzione dei problemi del processo di flashing
🔌 Collega e configura il dispositivo
📡 Flashing dispositivi nRF52 & RP2040
-
⚡ Processo di aggiornamento firmware per dispositivi nRF52 e RP2040: I dispositivi basati su nRF52 e RP2040 architetture offrono un processo di aggiornamento firmware semplice che non richiede alcun driver o installazione software su nessuna piattaforma.
-
📂 Trascina e rilascia: Questi dispositivi utilizzano il metodo di installazione Drag & Drop per installare le versioni del firmware. Basta trascinare il file del firmware sul dispositivo nel tuo esplora risorse.
-
📶 Aggiornamenti Over-The-Air (OTA): I dispositivi nRF52 possono ricevere aggiornamenti firmware OTA da un dispositivo mobile tramite Bluetooth, permettendo aggiornamenti senza connessioni fisiche.
-
🧹 Factory Erase: Prima di installare un nuovo firmware, potresti considerare di eseguire un Factory Erase per cancellare eventuali dati esistenti che potrebbero cambiare formato o posizione tra le versioni.
🔄 Conversione da RAK4631-R a RAK4631: Se il tuo dispositivo non è fornito con il bootloader Arduino, dovrai eseguire una conversione per garantirne la compatibilità.
-
🛠 Uso del Raspberry Pi come strumento di flashing SWDIO: Se il tuo dispositivo non può essere flashato via USB o Bluetooth, un'opzione alternativa è usare una connessione diretta SWDIO con un Raspberry Pi come strumento di flashing.
📂 Aggiornamenti firmware Drag-and-Drop per nRF52 & RP2040
💻 Flash del dispositivo
-
🌐 Ora puoi utilizzare il Meshtastic Web Flasher per scaricare e trasferire il firmware ai tuoi dispositivi basati su nRF52 o RP2040. In alternativa, puoi seguire le istruzioni qui sotto per scaricare e installare il firmware.
-
🧹 Se hai recentemente eseguito un Factory Erase, il tuo dispositivo potrebbe avviarsi automaticamente in modalità bootloader. Puoi quindi procedere direttamente a "Copia il firmware appropriato..." per il tuo dispositivo specifico qui sotto:
🔵 nRF52
- ⬇️ Scarica e decomprimi l'ultimo firmware da Meshtastic Downloads.
- 🔌 Collega il tuo dispositivo al computer usando un cavo dati USB.
- 🔁 Premi due volte il pulsante di reset sul tuo dispositivo (questo entrerà in modalità bootloader).
- 💻 Verrà montata una nuova unità sul tuo computer (compatibile con Windows, Mac, Linux o Android).
- 📂 Apri questa unità, dove dovresti trovare tre file: CURRENT.UF2, INDEX.HTM e INFO_UF2.TXT.
- 📥 Copia il file firmware appropriato (firmware-DEVICE_NAME-X.X.X-xxxxxxx.uf2) dalla cartella di rilascio a questa unità.
- ✅ Dopo che il file è stato copiato, il dispositivo si riavvierà e installerà il firmware Meshtastic.
🟣 RP2040
- ⬇️ Scarica e decomprimi l'ultimo firmware da Meshtastic Downloads.
- 🔘 Premi e tieni premuto il pulsante BOOTSEL, quindi collega il dispositivo al computer usando un cavo USB.
- 💻 Verrà montata una nuova unità sul tuo computer (compatibile con Windows, Mac, Linux o Android).
- 📂 Apri questa unità, dove dovresti trovare due file: INDEX.HTM e INFO_UF2.TXT.
- 📥 Copia il file firmware appropriato (firmware-DEVICE_NAME-X.X.X-xxxxxxx.uf2) dalla cartella di rilascio in questa unità.
- ✅ Dopo che il file è stato copiato, il dispositivo si riavvierà e installerà il firmware Meshtastic.
⚠️ Possibili casi limite di flashing
- 🔎 Prima di caricare, assicurati di avere il RAK4631 e non il RAK4631-R. In caso contrario, dovrai cambiare il bootloader. Le istruzioni sono disponibili qui.
- ⚠️ Le versioni più vecchie del firmware possono conservare dati obsoleti, causando loop di crash. Se riscontri problemi nell'aggiornamento, esegui un azzeramento di fabbrica prima del flash.
🔌 Collega e configura il dispositivo
📡 Aggiornamenti Firmware Over-the-Air (OTA) per nRF52
🤖 Android
- ⬇️ Scarica il firmware da Meshtastic Downloads o da GitHub.
- 📂 Decomprimi la cartella del firmware.
- 📱 Apri l'app nRF Connect → scheda SCANNER → CONNETTI dispositivo.
- 🔗 Se mostra DISCONNECT, continua; se CONNECT, toccalo.
- ⚙️ Tocca l'icona DFU (in alto a destra).
- 📦 Seleziona "Pacchetto di distribuzione (ZIP)" → OK.
- 📥 Scegli il file firmware che termina con -ota.zip.
- ⏳ L'aggiornamento inizia automaticamente (potrebbe essere lento).
- ✅ Il dispositivo si riavvia dopo l'aggiornamento.
🍎 Apple
- ⬇️ Scarica il firmware da Meshtastic Downloads, GitHub o direttamente tramite l'app.
- 📂 Decomprimi la cartella del firmware.
- 📱 Apri la nRF DFU App e seleziona il file firmware corretto del dispositivo (che termina con -ota.zip).
- 🔗 Connettiti al tuo dispositivo.
- ⬆️ Carica il firmware.
- ⚙️ Vai nelle impostazioni e abilita "Notifica di ricezione pacchetti".
- 🔽 Cambia "Numero di pacchetti" a un valore più basso; alcuni utenti hanno avuto successo con "5".
🧹 Reset di fabbrica per dispositivi nRF52/RP2040
- 💾 Meshtastic utilizza la libreria littlefs per memorizzare la configurazione, i log e altri dati nella memoria flash interna dei dispositivi nRF52 e RP2040. L'aggiornamento del firmware non cancella questi dati, il che può causare problemi se i formati cambiano tra le versioni.
- 🌐 Puoi usare il Meshtastic Web Flasher per cancellare a livello di fabbrica i tuoi dispositivi. Seleziona la tua scheda e clicca sull'icona 🗑️ per cancellare. In alternativa, segui le istruzioni qui sotto.
🔵 nRF52
- ⬇️ Scarica e decomprimi l'ultimo firmware dalla pagina Download di Meshtastic.
- 🔌 Collega il tuo dispositivo tramite USB.
- 🔁 Fai doppio clic sul pulsante di reset per entrare in modalità bootloader.
- 💻 Una nuova unità viene montata (Windows/Mac/Linux).
- 📂 L'unità contiene: CURRENT.UF2, INDEX.HTM, INFO_UF2.TXT.
- 📝 Apri INFO_UF2.TXT e annota il valore SoftDevice.
- 📥 Copia il file UF2 corretto per la cancellazione di fabbrica (Meshtastic_nRF52_factory_erase...) sull'unità. Il dispositivo si riavvia.
- 💻 Esegui
meshtastic --noprotonel terminale. - ✅ Dovresti vedere: Formatting... Done.
🟣 RP2040
- ⬇️ Scarica flash_nuke.uf2.
- 🔘 Tieni premuto BOOTSEL e connetti via USB.
- 💻 La scheda si monta come RPI-RP2.
- 📥 Copia flash_nuke.uf2 sulla unità.
- ✅ La scheda si riavvia e la memoria flash è cancellata.
🔄 Conversione da RAK4631-R a RAK4631
💻 Aggiornamento firmware dispositivo USB (DFU)
- ⬇️ Installa Python.
- ⬇️ Installa adafruit-nrfutil.
| 📦 pip3 install adafruit-nrfutil |
-
🧹 Ora puoi usare Meshtastic Web Flasher per cancellare completamente i tuoi dispositivi basati su nRF52 o RP2040. Visita il flasher, seleziona la tua scheda e clicca sull'icona 🗑️ del cestino a destra del pulsante Flash. Si aprirà una finestra per avviare la procedura di cancellazione. In alternativa, puoi seguire le istruzioni qui sotto.
🔵 nRF52
- ⬇️ Scarica e decomprimi l'ultimo firmware dalla pagina di download di Meshtastic.
- 🔌 Collega il tuo dispositivo al computer usando un cavo dati USB.
- 🔁 Doppio clic sul pulsante di reset sul tuo dispositivo per entrare in modalità bootloader.
- 💻 Una nuova unità verrà montata sul tuo computer (Windows, Mac o Linux).
- 📂 Apri questa unità, e dovresti vedere tre file: CURRENT.UF2, INDEX.HTM e INFO_UF2.TXT.
- 📝 Apri il file INFO_UF2.TXT in un editor di testo e annota il valore SoftDevice.
- 📥 Trova il file nel firmware scaricato che corrisponde alla tua versione di SoftDevice (7.x.x o 6.x.x). Usa Meshtastic_nRF52_factory_erase_v3_S140_7.3.0.uf2 o Meshtastic_nRF52_factory_erase_v3_S140_6.1.0.uf2, e copialo sull'unità. Il dispositivo si riavvierà.
- 💻 Con il Meshtastic CLI installato, apri Terminale/Console e inserisci:
meshtastic --noproto. - ✅ Dovresti vedere il messaggio: Formattazione... Fatto.
🟣 RP2040
- ⬇️ Scarica il flash_nuke.uf2 file sul tuo computer.
- 🔘 Premi e tieni premuto il pulsante BOOTSEL, quindi collega la scheda al tuo computer usando un cavo USB.
- 💻 La scheda dovrebbe ora apparire come un dispositivo di archiviazione di massa sul tuo computer, etichettato come RPI-RP2.
- 📥 Copia il flash_nuke.uf2 file su questo dispositivo.
- ✅ La scheda si riavvierà automaticamente e la memoria flash verrà cancellata.
🔄 Conversione da RAK4631-R a RAK4631
💻 Aggiornamento firmware dispositivo USB (DFU)
- ⬇️ Installa Python
- ⬇️ Installa adafruit-nrfutil
| 📦 pip3 install adafruit-nrfutil |
🛠 Debugger
| 📦 pip3 install pyocd |
- ⬇️ Scarica il bootloader necessario: WisCore_RAK4631_Board_Bootloader.hex
- 🔗 Collega il RAKDAP come indicato di seguito:

-
⚡ Flash del bootloader
| 💻 pyocd flash -t nrf52840 .\WisCore_RAK4631_Board_Bootloader.hex |
-
➡️ Procedi con le istruzioni di flashing standard.
🔄 Aggiornamento o recupero del bootloader sui dispositivi nRF52
✅ Metodo 1: Aggiornamento con il file UF2 (Consigliato)
- 📥 Lilygo T-Echo
- 📥 RAK4631
- 📥 Seeed Tracker 1000-E
- 📥 Generic Meshtastic 6.1.1 per DIY
- 📥 Generic Meshtastic 7.3.0 per DIY
- ⬇️ Scarica il file UF2 Bootloader corretto.
- 🔌 Collega il tuo dispositivo al computer usando un cavo USB.
- 🔁 Attiva la modalità bootloader premendo rapidamente due volte il pulsante RESET. Per il Seeed Tracker 1000-E, tieni premuto il pulsante utente, quindi collega rapidamente il cavo USB alla porta MagSafe due volte. Il dispositivo dovrebbe apparire come un'unità rimovibile.
- 📂 Trascina e rilascia il file UF2 che hai scaricato nell'unità rimovibile. Il dispositivo aggiornerà automaticamente il bootloader e si resetterà.
- ✅ Una volta che il dispositivo si resetta, l'aggiornamento è completo. Il tuo dispositivo ora ha la versione più recente del bootloader, e puoi procedere con la scrittura del firmware.
⚠️ Metodo 2: Usare adafruit-nrfutil
- 📥 Lilygo T-Echo SHA256: 85d8a334bbf82802d712e183f29ec5215f06786ca88914687c437aceab75d9cf
- 📥 RAK4631 SHA256: 4a216ad2be8be23b80371a11753677c850c5711d3b85129390a416fc47ea0910
-
📦 Seeed Tracker 1000-E SHA256: 8c69f0d43a7aac925055451d7262682d6926d4cfb7ea8240b466dc8f16a692ba
-
📦 Generic Meshtastic 6.1.1 for DIY SHA256: ecebecea849ab79d09517dd4f6ff98de5647fe275b0b4d525501e6c29cb5a586
-
📦 Generic Meshtastic 7.3.0 for DIY SHA256: 9a38edf4e974a6f705c41b296499a4fc57682ec9bb686eecd9f3d8d02fc6ffcf
- 💻 Apri un terminale o prompt dei comandi e installa adafruit-nrfutil eseguendo il comando seguente:
| 📦 pip install adafruit-nrfutil |
- ⬇️ Ottieni il pacchetto ZIP corretto.
- 🔌 Collega il tuo dispositivo al computer usando un cavo USB.
- 💻 Nel terminale o nel prompt dei comandi, vai nella directory dove hai scaricato il pacchetto ZIP del bootloader ed esegui il comando seguente. Sostituisci /dev/ttyACM0 con la porta corretta (gli utenti Windows possono usare COMx):
| ⚡ adafruit-nrfutil --singlebank --touch 1200 --verbose dfu serial --package <downloaded file>.zip -p /dev/ttyACM0 -b 115200 |
- ✅ Una volta completato il processo, l'aggiornamento è terminato. Il tuo dispositivo ora funziona con l'ultima versione del bootloader, permettendoti di procedere con il flashing del firmware.
🛠 Metodo 3: Uso di un debugger
🍓 Uso di SWDIO per il flashing con un Raspberry Pi
🔌 Configurazione dei collegamenti
⚙️ Installa il software OpenOCD
|
🔄 $ sudo apt update 📦 $ sudo apt install libtool autoconf automake texinfo telnet gdb-multiarch git 🌐 $ git clone git://repo.or.cz/openocd.git 📂 $ cd openocd/ ⚙️ $ ./bootstrap ⚙️ $ ./configure --enable-bcm2835gpio ⚡ $ make -j4 ✅ $ sudo make install |
🔍 Verifica Connessione
| 💻 $ openocd -f ./openocd/tcl/interface/raspberrypi-native.cfg -c "transport select swd" -f openocd/tcl/target/nrf52.cfg -s tcl |
|
🖥️ Open On-Chip Debugger 0.12.0+dev-00633-gad87fbd1c 📜 Licenziato sotto GNU GPL v2 🔗 Per segnalazioni di bug, leggere http://openocd.org/doc/doxygen/bugs.html ⚡ swd ℹ️ Info : In ascolto sulla porta 6666 per connessioni tcl ℹ️ Info : In ascolto sulla porta 4444 per connessioni telnet ℹ️ Info : driver BCM2835 GPIO JTAG/SWD bitbang ⏱️ Info : frequenza di clock 100 kHz 🔎 Info : SWD DPIDR 0x2ba01477 🧩 Info : [nrf52.cpu] processore Cortex-M4 r0p1 rilevato 🛠️ Info : [nrf52.cpu] il target ha 6 breakpoint, 4 watchpoint ✅ Info : [nrf52.cpu] Esame riuscito ⚙️ Info : [nrf52.cpu] avvio del server gdb sulla porta 3333 ℹ️ Info : In ascolto sulla porta 3333 per connessioni gdb 🔗 Info : accettando la connessione 'telnet' su tcp/4444 |
⬇️ Scarica il Firmware
⚡ Programma il Firmware
|
💻 $ telnet 127.0.0.1 4444 🔗 Tentativo di connessione a 127.0.0.1... ✅ Connesso a 127.0.0.1. ⎋ Il carattere di escape è '^]'. 🖥️ Apri On-Chip Debugger ⚙️ > init ⚙️ > reset init ⏸️ > halt 🧹 > nrf5 mass_erase 📥 > program firmware.hex verify 🔄 > reset 🚪 > exit 0 |

